Here’s what I’ve been keeping busy with lately!
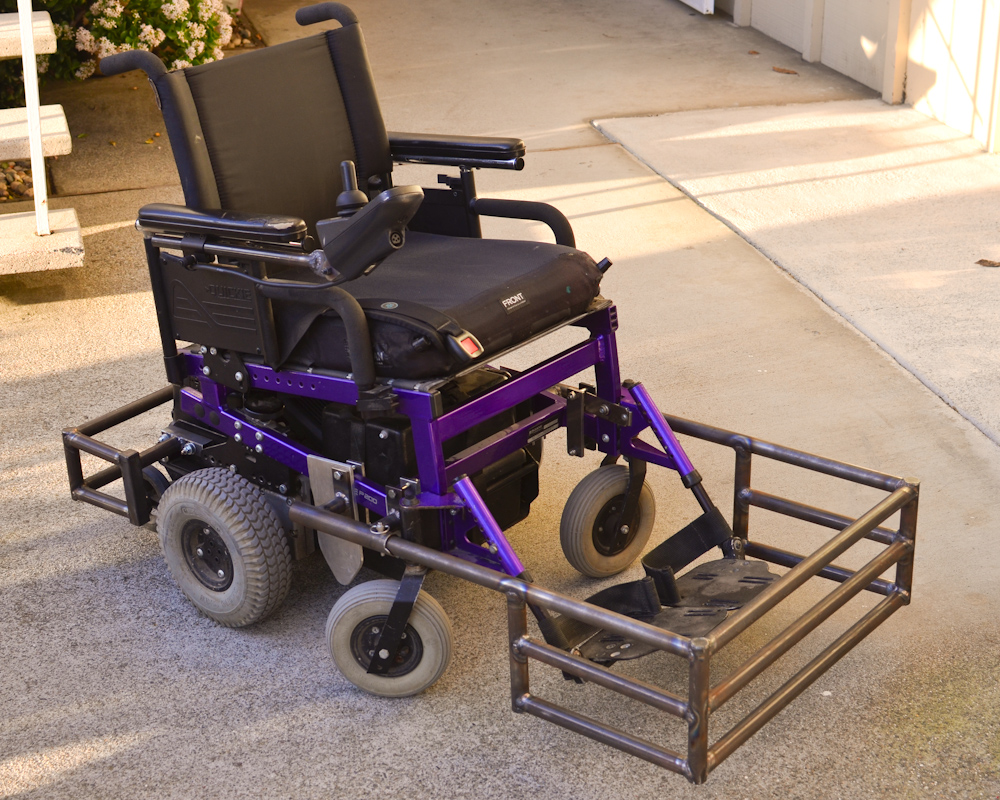
One of the BORP players was able to get a new Quickie P200 (new to him- they haven’t been manufactured in at least five years), and he asked me to give it “the works”. I took this as an opportunity to try out a few ideas, and this is the result.
First I swapped out the control electronics for something more modern than the 1990-era motor controller, then I got to work on the welding. I posted last month about a new idea for a soccer guard that would be more robust than my stronger design, but also easier to make and cheaper. Call it Version Two- the guy who’s using it seems to like it, but I was finishing the build I realized that the design had space to evolve past some earlier limits of Version One.
Version One was my first venture into designing a welded steel structure that would receive a lot of abuse. I didn’t know how to weld yet, and I didn’t have a good feel for how tough chromoly can be. I knew that we wanted a guard with square corners for better spin kicks, and I knew that I wanted to minimize the weight and rotational inertia of the guard. I spent a lot of time doing calculations and what I eventually came up with had just over a pound of steel in the front four bars- some of the wall thicknesses are 0.035 inches! I’ll admit that I was worried that the guard might cave in from a bad hit, and so I was thinking about what I’d do if that happened.
At the time I designed V1, Kendra was using a Power Soccer Shop guard. My plan in case of damage was to be able to quickly change back to that guard. It wasn’t as good, but it was better than nothing and a lot of people had them. One very important thing for somebody playing for Team USA equipment reliability. We spent two years and many thousands of dollars training and getting to the World Cup- redundancy and contingency plans were important, and I liked the option of borrowing a guard or just bringing the old guard as backup. In the end we brought two complete chairs to the World Cup (but that’s a story for another day…)
Due to my limitations in fabrication abilities at the time, the original mounts sat directly on the P200 frame. The Power Soccer Shop guard just sat at an angle, but the convex front made this less apparent. With the flat front on the new guard I had to include the frame’s seven degree angle to keep the front face vertical with the existing mounts. It was convenient because all I really needed was a saw and a drill, but now that I have some experience welding I saw a better way, and I saw that including a (stupid) seven degree angle in V2 was completely unnecessary. The player I built V2 for had similar mounts so the bends were required… but welds take a lot of prep work, welds are where things tend to break, and this bend is one of the most highly stressed parts of the guard. In both V1 and V2 I included extra reinforcement (more welding). Starting with a clean slate I realized that I could use a heavier top tube in V3 and skip the whole mess.
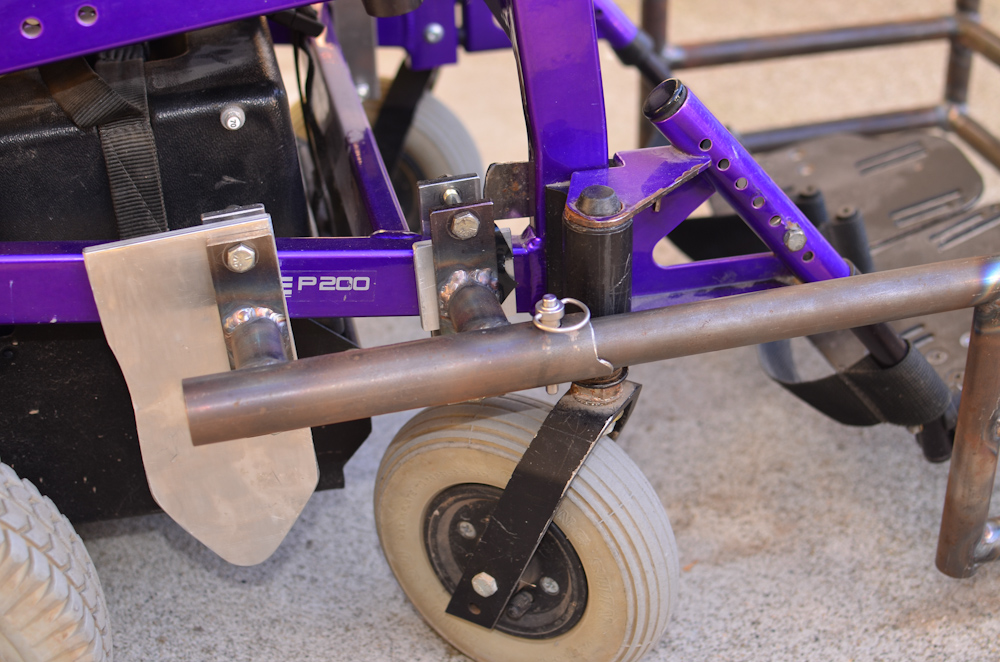
An extra benefit of all of this is that by using a round tube I was able to find a source for telescoping sizes of tube to let the guard slide into place securely. In place of four inconvenient screws to secure the guard, V3 just has a quick release pin.
You can see that I also used the guard mount to hold a side guard in place. That was an easy way to go, and I think it’s going to be sufficient to keep the ball from getting trapped. The worst part of this was trying to get the spacing between the two mounts at a close match to the guard tubes. I’ll be thinking about how to make that easier.
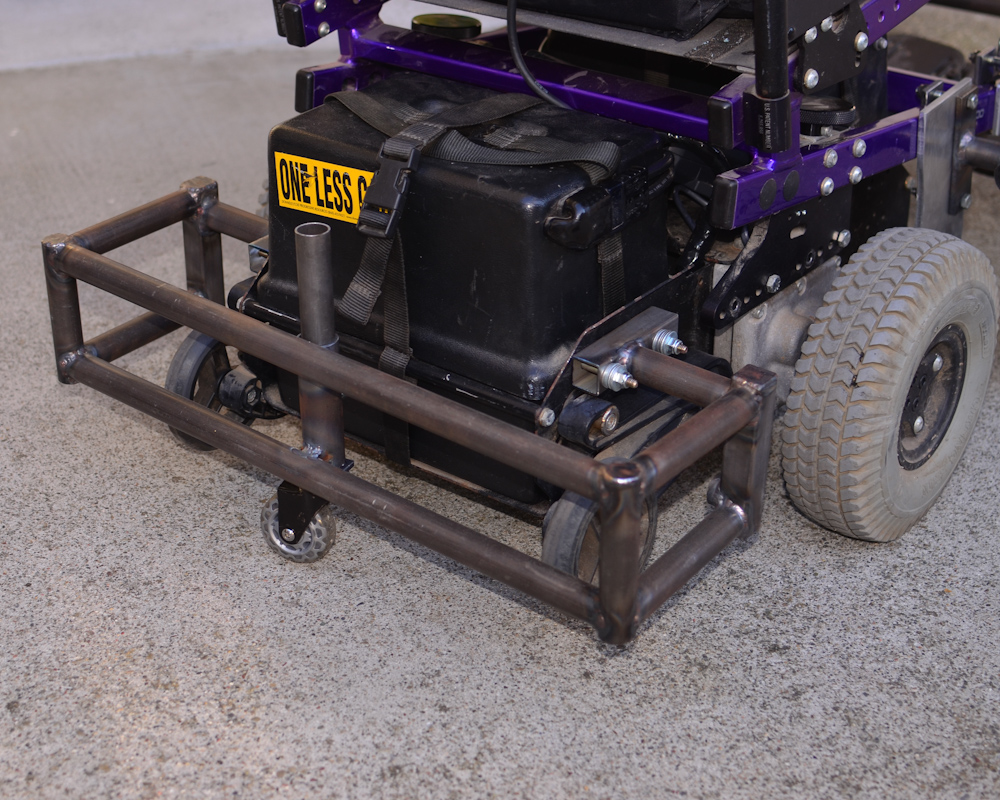
The player who owns this chair also wanted a rear guard. This is an allowed attachment that protects the battery box and anti-tip wheels, but also provides a strong and predictable surface for blocking and striking the ball. I’ve never built one before, so I’ll be watching closely to see how this one works out.
Each of the P200’s that I rebuild for soccer gets re-adjusted so that the driver’s center of gravity is placed right over the drive wheels. This improves traction and helps a lot for pivoting to hit the ball… the drawback is that it becomes far to easy to pop wheelies. This wastes time, makes control much more difficult, and can be really unsafe if the chair starts to run up and over the ball. All of the chairs that I’ve reconfigured to be so balanced so far have received additional anti-wheelie casters in the back. This keeps the front of the chair down, and greatly improves handling for the players.
Unfortunately, the same way that the V1 guard mounts were a product of what I was able to do with hand tools in an apartment’s kitchen, the anti-wheelie casters have been attached to the chairs in a primitive way. I use a piece of steel L-stock bolted to the back with two screws, and it takes some good hands to get the wheel on and off quickly. Most of the volunteers at practice struggle with it at first, and I’m probably only good at it because I used to do it three or four days per week when Kendra was training.
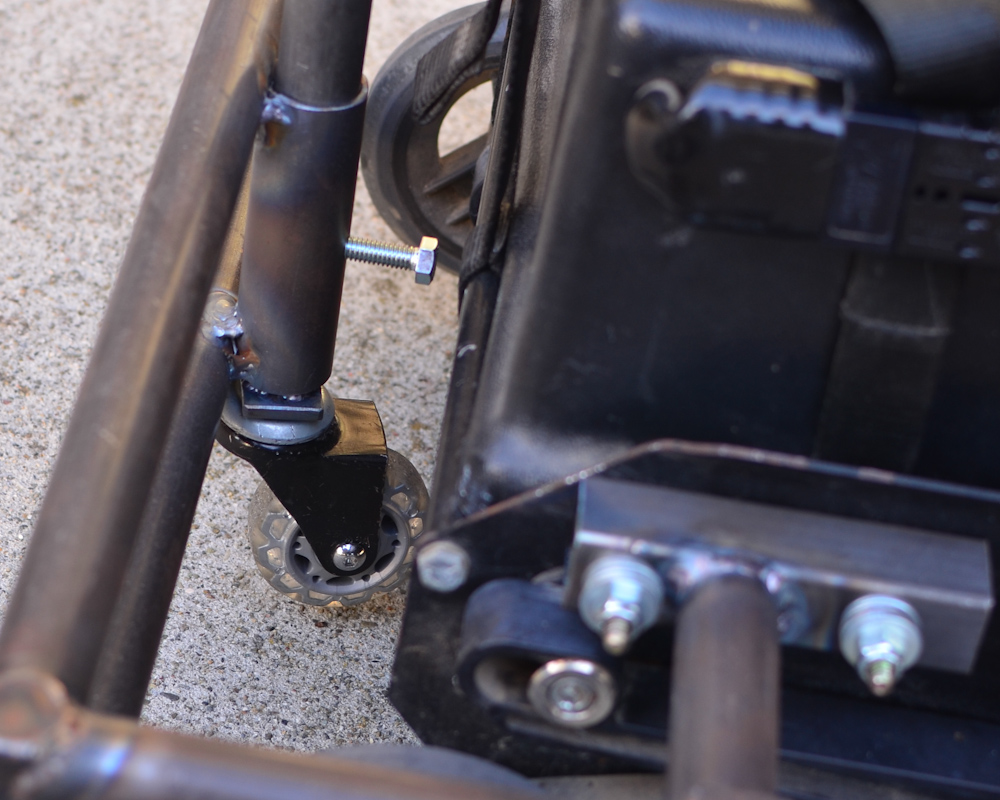
I’ve tried a couple of iterations of new attachments before, but nothing I’ve been happy with. I think that putting the wheel into the rear guard is as close as I’ve come to making it easy and strong. Here’s a detail view of how the wheel is attached:
When somebody’s sitting in the chair that wheel is almost an inch off the ground, though it’s almost touching the ground in this picture. The caster is screwed into the end of a tube that sits inside one of those telescoping sections, and there’s a screw that threads into the outer piece and pinches the inner piece. So far I’ve been able to drive the chair around over curb cuts and real-world terrain without getting stuck on anything that wasn’t an obvious problem. The next time I do this I’ll be looking for a way to have the retracted position a bit higher to be more sure that can’t happen.
That’s my latest! I’m really happy that I have a TechShop membership that allows me to have access to the right tools for the job so that I can do all of this stuff. I hope you’ve enjoyed reading about it.


It would look to me like you could replace that pinch bolt with a drilled hole and a hitch pin once you got the setting right for the player using the chair. That would probably be sturdier as well since there wouldn’t be any potential for slipping.
If you need to do retractable, perhaps do a second set of holes to hold the wheel in the upright position. Add an indexing pointer to the top of the tube so you can see where the holes are, and it should be a really quick and easy thing to set for on / off court modes.