
This is is the very first post in my LX521 build, not counting a couple of background posts saying what I’m building and why I’m building it. Tonight I got started on making my speaker wires. The LX521 is a four-way speaker with an active crossover, meaning that for a stereo pair I need eight amplifier channels and I need to plug in a total of sixteen wires in the correct fashion or I risk blowing up some drivers. If I swap the tweeter channel with any other channel it will probably destroy the tweeters right away. If I switch any of the others it might not break them right away, but it will sound very wrong. If I flip the polarity of anything, it will sound wrong but I’ll probably have a hard time putting my finger on it at first.
One way to tackle this would be to get a bunch of the typical binding posts that you see on any speaker, and just label everything carefully. That’s a little tedious, it takes up some space, and it won’t look very good. Another way to do it is to get a speaker cable with eight conductors in it and use a single plug with eight terminals. I got a set of 8-pole Neutrik Speakon connectors, and once I get those set up correctly I won’t have to worry about it again.
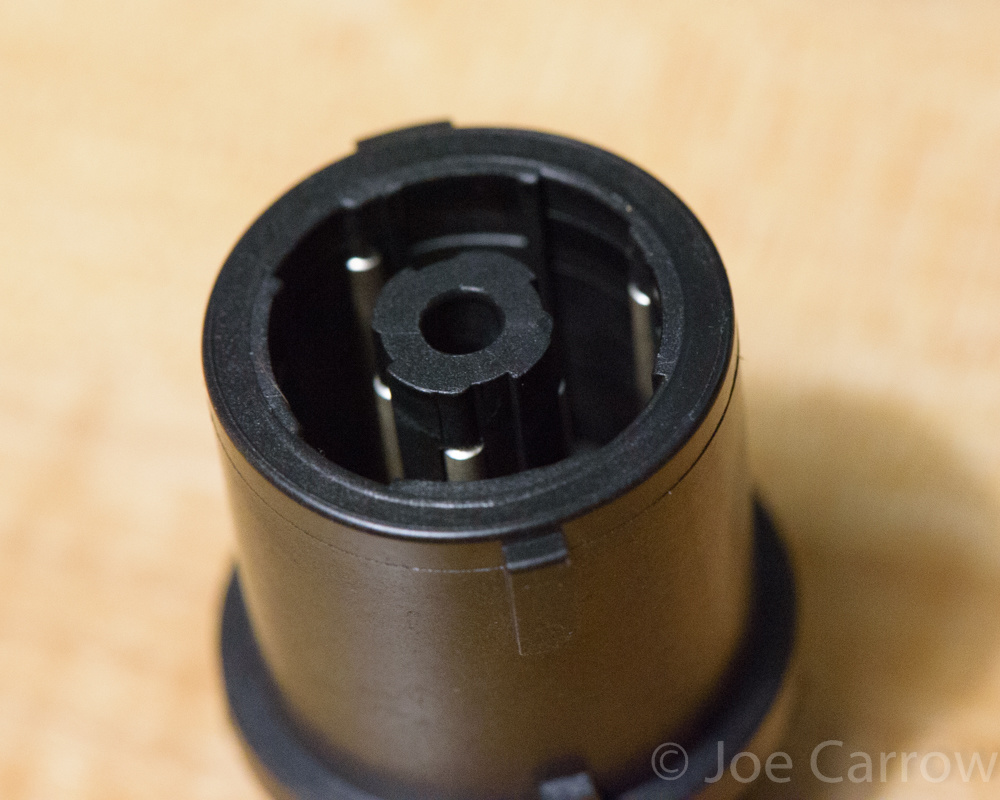
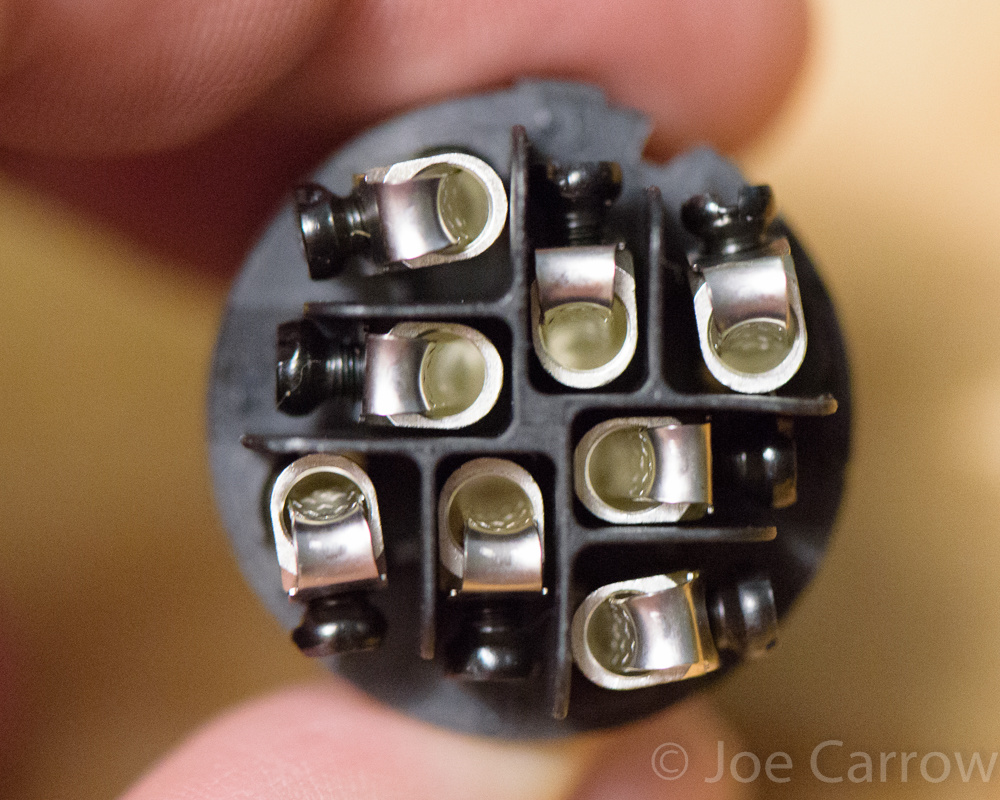
The connector has eight bars around the inside and outside of the barrel that are locked into place when the connector is inserted into its receptacle and rotated about a quarter turn. They’re rated for 30 amps per contact and 250 volts, so one of these plugs could pass over 25kW of musical power if it had to. These are commonly used for the kinds of speakers used at concerts. They’re overkill, but they were basically the same price as using four times as many of the regular connectors.
It was a little tricky to figure out how to assemble them at first, but it’s not so bad. They have eight screw terminals to accept the wires, which is nice because I don’t have to crimp or solder anything.
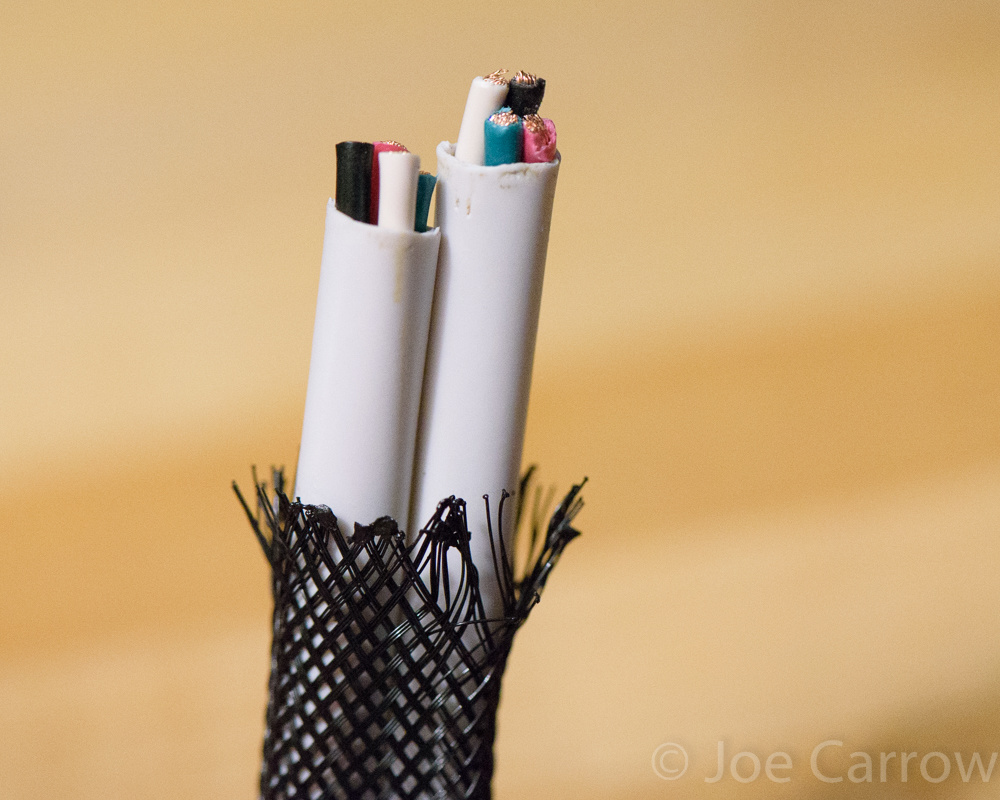
I wasn’t able to find any eight-conductor cables sold in small quantity, so I’m just going to double up on some four conductor wire from monoprice. I don’t think that it’s terribly important for the wire pairs to be individually twisted, but I do plan on running the tweeter and sub channels through two different lengths of cable just to be safe. I’m putting the two lengths of cable through some Techflex to keep them tidy.
I consider all of this to be a safe level of overkill, even though it’s by no means the pinnacle of what could have been done. It’s a twelve foot run of 14AWG stranded wire, so that should add about 0.06 ohms of resistance in series with each driver. The woofers will be in parallel and will present a two ohm load, so this is about 2.5% of the speaker impedance. Because this system uses an active crossover the increased resistance won’t have an effect on the crossover frequency or slope, but it will attenuate the woofers by about 0.2 dB. The mids and tweeters are 4 and 8 ohms so the impedance will affect them less. When I’m done I may measure the inductance of the cables to verify that they’re not causing any rolloff in the tweeters, but that’s it. A lot of speaker cable vendors go on about all kinds of magnetic/metallurgical voodoo, but I work with a lot of electrical engineers with PhDs who spend all day designing and building sensitive high performance analog circuits, and I have never once heard them talk about the kinds of things that audiophile speaker cable companies base their products on. As far as the EEs are concerned, a wire has resistance, capacitance, and inductance. If anybody out there wants a really honest measurement and has some expensive cables, get in touch and maybe I can bring them to someone who knows how to use the fancy equipment so that we can compare.
I think that’s probably enough posting about speaker cables, you’ll see more of them when it’s all installed. If you want to read a real EE’s opinion, go back to Linkwitz.
Just a few details on the build… It is a little hard to see the markings on the black plastic that say circuit and polarity, so I marked up an image.
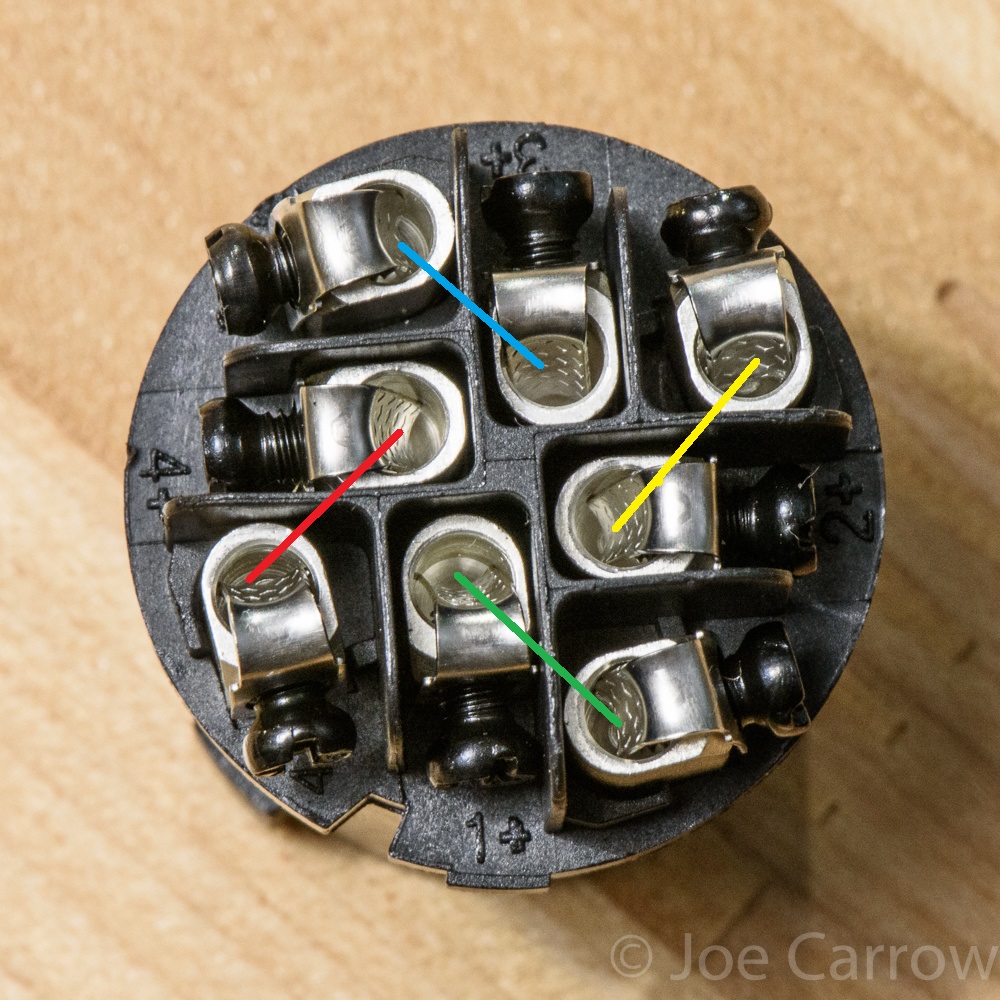
For my build I’ll do:
1 – Tweeter (green circuit, cable 1, red positive, black negative)
2 – Upper mid (yellow circuit, cable 1, green positive, white negative)
3 – Lower mid (blue circuit, cable 2, red positive, black negative)
4 – Woofers (red circuit, cable 2, green positive, white negative)
Lets hope I don’t cross any wires!